Wednesday, October 6, 2010
handcrafting an alloy fender
I built a fender for a customer today, so I decided to post some progress pictures to help out those who are trying to get into metalworking. First I start with an annealed aluminum blank, with a centerline and two sidelines 1" away from each side.
Start hammering along the centerline to stretch that section of the metal and start developing both radii of the fender. A fender is a good part to learn because it has two separate curves to it, a major curve along the tire, and the minor curve around the profile of the tire.
Using a dolly and soft slapper, bring the sides in, which will flatten the folds developed in the hammering and begin to shrink the sides.
Go back to hammering the center to keep developing the crown of the fender, at this point, you can move gradually out to the side lines with the hammering, blending the force as you go out. The sides will continue to fold, and this is a good thing, as you want the sides to shrink as you stretch the center.
Back on the dolly, bring the sides flat again, and this will gradually shrink the sides and start smoothing the piece.
Now's a good point to check your work against your "template" here I am just using the type tire the customer has. You want to leave the fender a little flat at this point because the english wheel will stretch the middle more, developing the major radius a bit further.
Using a steel slapper, work out most of the hammer marks, and check for straightness of the part by sighting down the centerline. Use the sidelines to check the minor radius for symmetry.
Using the english wheel and a 12" radius die, roll the fender lengthwise, which will even out the part. You're not moving much metal here, just smoothing out the hammer marks and giving the surface a smoother finish.
Continue checking your work to make sure you don't put too much crown on the fender, it's hard to shrink metal and much easier to stretch, don't go to far.
Using the steel slapper and dolly, the sides can be planished and straightened, as the sides are brought straighter, the fender will lose some crown, so check against your template as you're working.
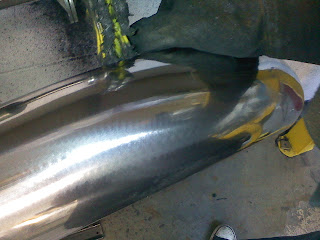
After sanding, you can begin polishing with a heavy wheel like sissal or my favorite, a finger buff. A hard cutting compound is a good choice. Work in one direction only at this point. When moving to a softer wheel, work in a perpendicular direction, this will help you see your progress and eliminate the bigger marks from the tougher compound.
Subscribe to:
Post Comments (Atom)


wow. i am impressed, and shocked to see your local. keep up the good work.
ReplyDeleteamazing!
ReplyDelete