Showing posts with label handmade. Show all posts
Showing posts with label handmade. Show all posts
Thursday, September 19, 2013
Wednesday, September 18, 2013
Handmade alloy cafe racer tank
I use something called a tuck shrinker to shrink edges, some people like to use an an edge shrinker, but hammering a tuck more effectively shrinks than a mechanical shrinker. Stretching the center is done with a hammer and shotbag. Lots of people new to metalworking are under the impression that the english wheel is the workhorse of the shop, but most of the shaping is actually done with the first two tools. The wheel is really a finishing and fine shaping tool.
I'm using a wooden buck I made years ago for this tank, since then I usually make a foam buck because it's not really necessary to have something as sturdy as wood when you're just using it as a shape reference. Wood is certainly nice when you need to clamp panels in really complex shapes or where really critical accuracy is required, but for most alloy tanks, getting things within half an inch or so is perfectly fine.
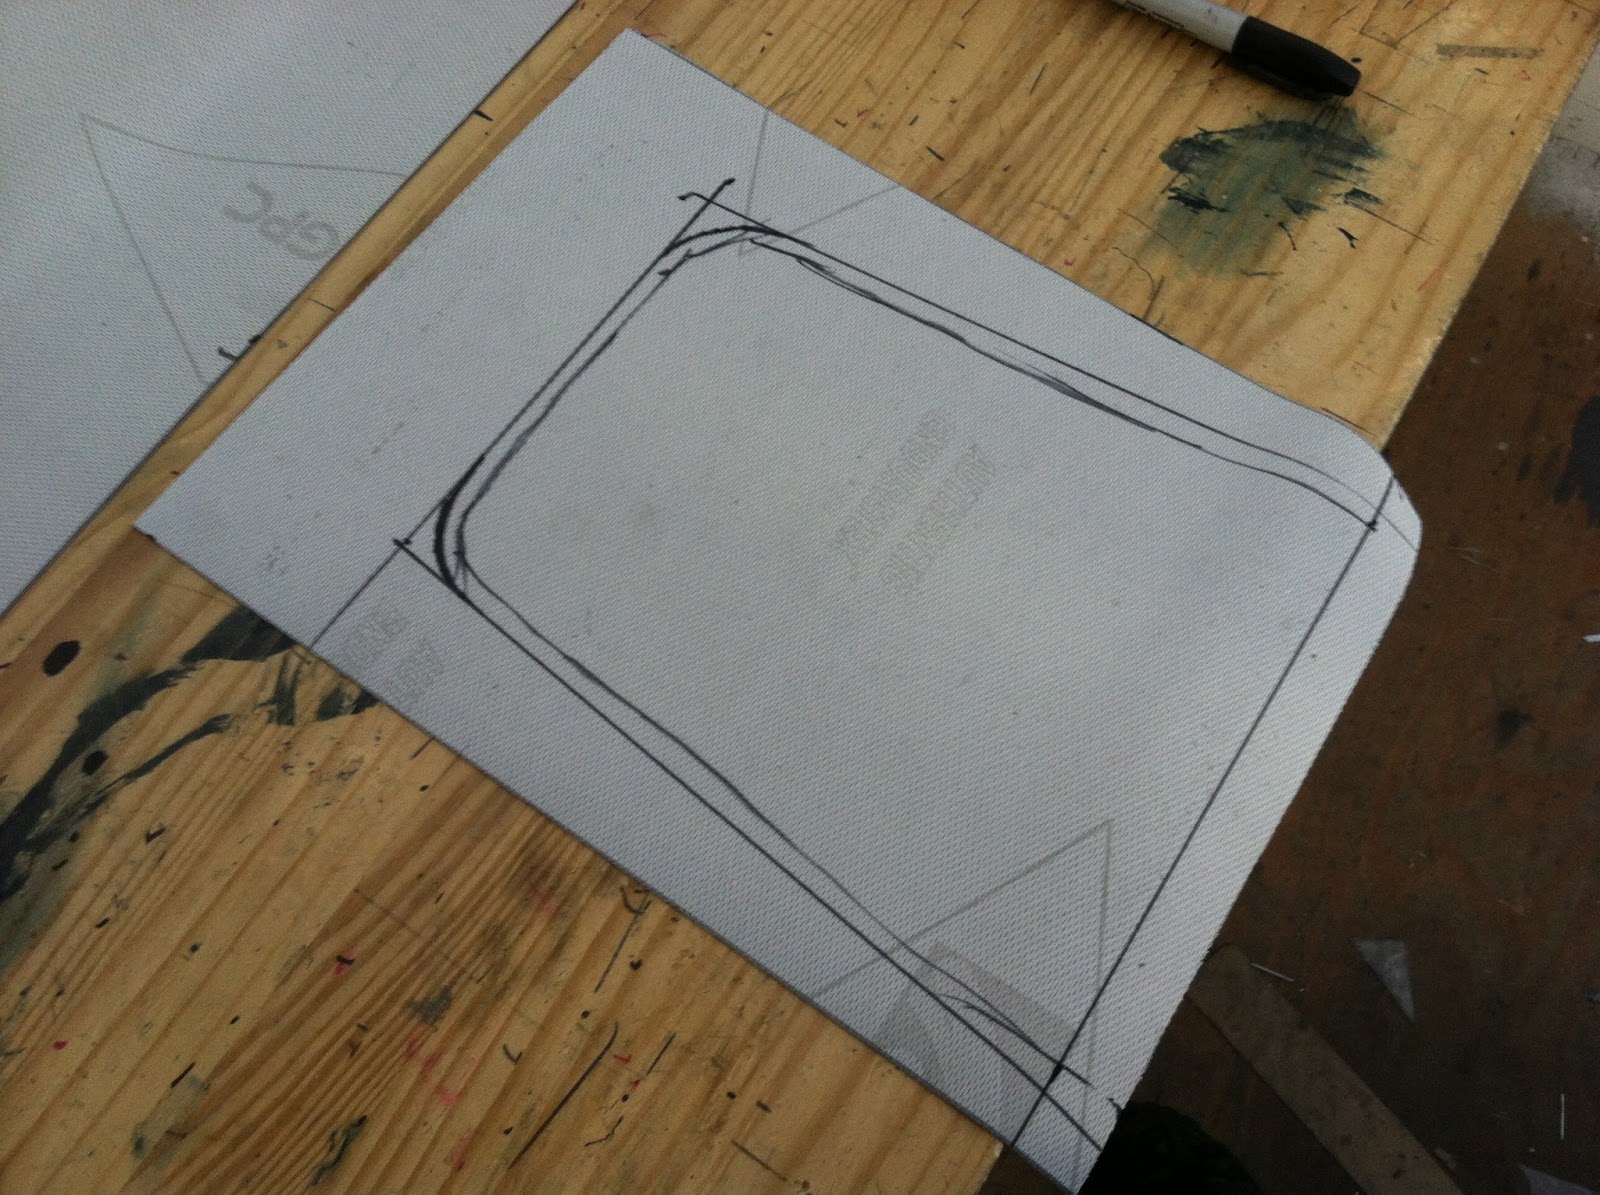
Monday, September 9, 2013
Building an alloy Manx tank
Going to do a little writeup on building an aluminum tank, recently I took some in process photos as I built a manx tank for a customer's cx500 cafe racer.


First I like to start with a pattern, foam is fine to use as a template, especially when it doesn't require an exact copy, but you're just working out a shape. It helps to figure out mounting and clearance issues with the bike before banging out any metal too.

Depending on your style, you can start forming any part of the tank first, I usually like to start the sides on manx types first, because the top is mostly flat and a lot simpler. I like to be able to put each side next to each other to guarantee symmetry.
Since the pics were just in progress pics, I'll detail more of the actual forming process in the next few days' posts.
Friday, September 6, 2013
How to do quality cafe racer seat upholstery (Part 2)

Since I use a flat fell type of seam for durability, I need to create a trim line offset from the edge of the foam by a little more than usual, I like to use about 1/2". This is where the vinyl will be trimmed and where I'll line up the edge of the skirt piece.
To stitch the skirting to the main seat piece, I use transfer tape to stick the pieces together before actual stitching, this keeps things from moving around and ruining the straightness of the seam. The first stitch is done on the backsides of the vinyl, then it's folded over and the next stitch is done about 1/4" from the first seam. This makes the skirting hang perpendicular to the main seat piece without any bunching.


Next, the back piece gets stitched to the main seat piece, I use transfer tape again to lock it in place so nothing bunches up while stitching. This piece can be cut extra large because it's trimmed to match the back piece of foam.

Once the back piece is stitched, the whole cover is temporarily put on the foam and the back piece is pinned to the back foam, this gives it the shape it will take on when the pad is done.

To make the back skirt piece, I use two pieces of transfer tape, one to fold the first 1/2" of vinyl over on itself, and the next piece on top of that fold.

The rear skirt is then stretched over the back piece of vinyl and pressed so the transfer tape holds it in place, then the pins are removed and the piece is unfolded and stitched.

The piece is then folded over and the second stitch is done, extra care has to be taken here because any mistakes will cause the back of the seat to be uneven.

The cover is then checked against the foam, when pulled tight it should be even and have no bunching anywhere.

The cover is then riveted to the base and pulled taught as it's riveted. Any excess material is trimmed off and hot melt adhesive can be used to flatten the creases against the fiberglass base.

All ready for installation!

Tuesday, September 3, 2013
How to do quality cafe racer seat upholstery
I've been upholstering my own seats for a few years now, and when looking back at the first ones, I'm a bit impressed at how they look now. Not blown away mind you, I'm a novice at best, but I think I can share some techniques with beginners that may help them along the way.
The style of pad I like to do is a separate upholstery unit, in my mind, it makes for a much cleaner look on the bike and is a lot easier to remove for underseat access than the snap cover type. This type is shown on my personal bike, yeah, I actually ride on the parts I make!

The first step in my process is to make a fiberglass base pan for the pad, I use an original seat for the mold, and wax it so the glass doesn't stick to it, a couple layers of chopped mat is stiff enough for this purpose. When it's all cured, I remove it and trim to the shape I want, I use templates for the seats I make all the time, it saves some measuring and marking time and ensures everyone's getting exactly what's in the picture.

Next I drill out holes for 1/8" rivets along the edge of the pan, I find rivets work best to hold down the material without starting tears in it.

Depending on the firmness desired, I make a base layer of at least 1/2" of high density closed cell foam, similar to yoga mats, or those floor covers for work areas. Spray adhesive or contact cement work well to hold the foam to the fiberglass base. The next layer(s) of foam should be a lower density type that adds a bit of cushion and lets the sewn material move a bit, it looks better than using only high density foam throughout.

With the foam layers adhered to the fiberglass base, I use a bandsaw, or a hand razor saw would work as well, to cut the foam using the edge of the fiberglass as a guide. This makes sure the foam is straight along the sides and won't make the covering look lumpy.

Next, and this is a very important step, (I've had people tell me some of the "really famous" builders don't do this and have problems with the covers tearing!), I cover the fiberglass edge in either a few layers of masking tape or gaffer tape. This keeps the abrasive fibers from rubbing holes in the vinyl covering... surprised that some people never think that far ahead.
tomorrow - sewing the cover
Saturday, August 31, 2013
How to build a Cafe Racer Seat
Ok, everyone wants it, here it is. Here's how you do it, the definitive guide on making your "cafe racer" seat. If you really actually truly follow these steps, and really actually listen to what I'm saying, don't skip steps, don't half-ass bits of the process because it was cheaper or you didn't have that tool, etc etc, you'll wind up with a nice seat that doesn't use 4 cans of Bondo.


Invariably, yes, it is cheaper and easier to buy a ready made seat, and frankly, the only reason you should do it this way is if you want your own style, or are a serious massochist.

The first thing you need is tools, shown here are a can of spray adhesive, a flexible tape measure (used more as a contour gauge than a ruler), coping saw, small drywall saw, rasp, contouring sanding block, ruler, xacto, tape measure and some pens.

And the first step is DRAW THE DAMNED THING! If you're one of those youtube generation kids, you've stopped reading by now and are just scrolling through the pics, so have fun with that. If you're still tuned in though, drawing the thing is the first step to a good design, sit on it for a day or two as well, you'll be amazed how many changes you make because of things you didn't consider, and how many changes you'll wish you made if you just start slogging fiberglass at something without thinking.

When you're really happy with the design, print it full scale, or if you drew it full scale, use it to trace out negative templates, these will guide you and help keep your part symmetrical. I like to use melamine from the hardware store, but chipboard or scrap boxes work too, just a bit flimsier.

As far as materials, I use urethane foam from the hardware store (it's the yellow stuff, not the pink or blue). The reason for this is that it's easy to carve and doesn't dissolve in contact with fiberglass. Most of the videos you see on how to do this tell you to cover your foam in plastic and mold release it. This is absolutely the worst thing to do, you want your fiberglass to stick to and follow the shape of your foam, not lay on top and slide down the sides because of the plastic and release agent. When you're done with the seat, you don't pop it off your foam anyway, you tear the foam out with the back of a claw hammer, you're done with it, there's no point in trying to save it.


Here's where your guides come in, you can use them to rough in the shape as you stack up the foam layers, then use them to guide your rasping and sanding to finish the shape.

Final carving has to be done carefully, because the final foam form is what determines your end shape, if the foam isn't straight, or smooth, then you're boned. The only way you'll recover from that is by grinding massive high spots down through the foam, reglassing, grinding again, and adding massive amounts of bondo to the low spots and adding a ton of weight and time in sanding. 99% of the fiberglass seat diy builds I see skip the step of getting the foam really smooth and straight, and go straight to slogging fiberglass. Then with the magic of editing, they turn 28 hours of sanding, grinding, rebondoing and swearing into a minute's worth of "finish work". Balls I say... this is how you really do it.

The next step, once you're absolutely positively sure your foam is good, is to begin glassing. You don't start glassing with mat, or cloth, or whatever, you start with surfacing veil, the really fine thin stuff that barely adds any thickness to the part. The reason is because you first want to create a nice shell surface to add thicker stuff to, a shell that will help thicker stuff stick and keep you from distorting the foam underneath as you apply the main glass layers.


once you've got a layer on, there are usually a few spots that don't stick all the way, so sand down the whole part to knock those off, and apply a second layer of veil, the second layer will lay down perfectly now.


And now onto a tacky but hard second layer of veil, you start applying your cloth. I don't like building one-off's with mat because it really doesn't lay down in a consistent thickness, doing it with cloth will save you hours in finishing time. A critical step is to really carefully plan how you trim your cloth, make sure it doesn't fold over anywhere, and where you overlap pieces, make sure the next layer skips the overlap, that way you're not creating any high spots that you'll have to grind off later.

If there are any areas that don't want to lay down, use some tin foil to hold them to the part, it peels off easily once the glass is cured and will keep you from having to spend more time grinding out bubbles and reglassing.

now that you've got a glassed part, hit it with the sander to knock down any high spots or burrs, and apply a SKIN coat of bondo, a skin coat is basically running the squeegee across the surface so the filler only fills the low spots, there should still be spots of fiberglass visible, and that's okay because your glass conforms properly to the foam model.

Once the bondo is cured, hit it with the sander again, you'll see a mix of glass and bondo on the surface, and that's fine, then apply another skin coat, this time use the curve of the squeegee to match the surface of the part, and do your best to make a consistent thickness layer of filler over the whole part (like, 1/32", not 1/4"). Hit the second layer with the sander again and if you've done things right, you'll wind up with a straight smooth part, strong and light.

I personally use Duratec surfacing primer next, it's essentially a gelcoat but has better sanding properties, spray the whole part evenly, you can use a cheapo HF spray gun to do it. The part should have a very light ripple, the stuff never lays completely smooth, but the ripple can then be sanded out with a sanding block and some 220 paper.

Any spots that are still low after the sanding can be skinned with filler, as they're probably only a hair's width below regular surface. Now you're ready to remove the foam, mount up the seat and prime&paint.
Thursday, August 29, 2013
DIY Cables
Every now and again I take in service work, often it's fixing "cafe racer" builds which were put together with little consideration or craftsmanship and promptly sold. One of the most common and annoying things I see on these is dropped handlebars with stock length cables, usually by the time they end up in my shop, the cables have either broken or are sticking because they're kinked at some ridiculous angle and have worn through the sheathing.


With just a little patience and a few dollars in parts, any garage builder can make or modify an existing cable to the proper length, preventing the problems that come with poorly routed cables and too much or too little slack. I usually use a special tool I made for crimping the cable housing ends, but in this demo, I'm going to use a really simple tool I made when I very first started fixing bikes.

Nothing in this post is especially expensive, and the only thing that really can't be found locally are the cable parts themselves, however, the cable ends, sheathing, sheathing ends and cable itself can be purchased online through motion pro's website. If you're shortening an existing cable, you really only need purchase the housing end, and the cable end.

The first step is to establish the length of the housing, then cut it to length and clean up the ends, I like to use a drill bit to pick out the scraps of the nylon sheath that like to get stuck inside when you cut it. Then pop on the ends, and using a really simple tool, you can stake the end to the housing so it'll never come off.

Then establish the length of the cable itself, if there are any adjusters in the line, I like to move those to fully tight and make the cable a touch on the long side. The ends for the cable can be purchased online, or can be made with a drill press and file, I make mine from brass on the lathe, but if I did a lot of cables I'd certainly buy a cable end assortment.

I keep some silver solder in my solder pot, which is just a scrap stainless part with a cap welded to the end, I find that if you don't have any tools to make something like this, a stainless measuring cup works just fine! Some plumbing flux and a blowtorch are the only other tools you'll need. Just put the ends on the cable, flux it, smoosh the end of the wire so it frays and won't easily slip back through, and dip in the hot solder pot. The flux, if done right, wicks the solder all the way through and around the cable end, ensuring a really good solid bond.
After some cleanup on the grinder, or with a hand file, the cable is ready to go, no more shotty cables on your cafe racer!


Monday, July 16, 2012
Making an aluminum cafe racer seat
I sometimes get the feeling that people who are into custom metalwork for their bikes or cars either think that making those parts is either extremely easy (I saw Jessie James build that tank with his English wheel!), or some sort of black magic. It's really neither, TV simplifies things too much, but working with sheet metal isn't anything more than a trade that isn't very common anymore, there's no magic to it at all. So I'm not revealing any secrets by showing how to make a pretty simple part, just doing a bit to preserve an old school skill.
So here's the step by step.

First I cut out a blank from some 14ga aluminum, I've worked out the shape over the years so I can make a seat just about the same size every time without having to trim much off at the end.

A cafe seat is typically just a hemisphere, which is really just a simple compound curve, there's a curve along the axis of the seat, and across the axis, a fender is really the same type of shape, just with one curve having a larger radius than the other!

To start forming the sheet, the middle needs to be stretched out, stretching the metal makes it thinner, so it takes up more surface area, if its edges can't move, it has to pop out, so that's how you "dome" metal.

Since I don't want to only stretch the metal (it would get really stupidly thin if I did), I shrink the edges to bring out the doming of the middle more. Shrinking actually makes the metal thicker, so it takes up less surface area, and tends to tuck in, so it pops any doming done to the sheet.

Shrinking is done by creating tucks at the edges, and then hammering them against an anvil, because of the shape of the tuck, the hammering actually gathers the metal together making it thicker, cool huh!

I use the English wheel mostly for small amounts of metal moving, it's a great tool for a specific job, it can dome metal, but not as fast as hammering, and it can't really shrink. It's this that makes me chuckle a little when some TV show shows some metals guy making a tank (but only shows them using the wheel!).

When the blank is shrunk and stretched a lot, it really needs to be wheeled to give it a smooth surface again, otherwise it's not really possible to keep stretching and shrinking efficiently.

This would be a rough wheeling, there's not much focus on getting a really nice planished finish, but just to bring the surface into some regularity. After this, the blank goes on to more shrinking and stretching, you can really see how much things can move!

After a few rounds of back and forth between the tuck shrinker, wheel and shotbag, I switch over to a larger radius anvil for the wheel (as close to the natural radius of the blank as you can get without going larger). It's with this setup and a constant light pressure that I planish the blank, it takes a lot of finesse and practice to get the blank really smooth and straight.

Now that the blank is formed, it's on to trimming to shape and building the rest of the seat! -I'll be posting that next.
Subscribe to:
Posts (Atom)